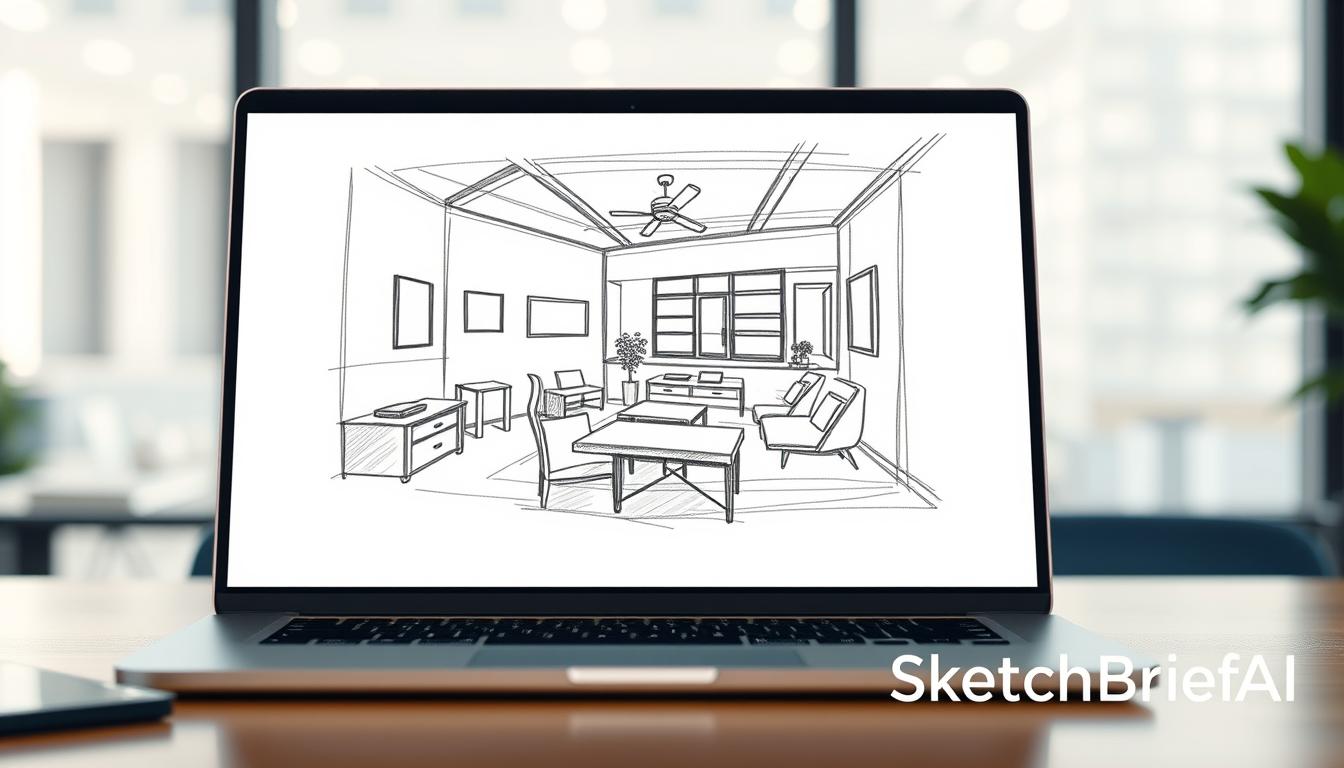
Can a quick field drawing become a polished, client-ready document without extra site visits or long rework?
We believe it can. By following a clear process, you keep the original mark-making while gaining clean, editable files for every project.
Capture a good source image, apply simple edits like brightness-to-transparency and binarization, then let tools speed routine cleanup. Manual fixes stay focused where they matter, saving you time and reducing back-and-forth with stakeholders.
Our approach balances traditional marks with modern automation so teams get consistent, presentation-ready outputs. We show when to use AI recognition and when to tidy lines by hand, all while keeping version control and scale references clear.
Key Takeaways
- Follow a repeatable capture-to-export process to cut rework.
- Use brightness-to-transparency and binarization to clean line work.
- Apply AI recognition for diagram-heavy tasks to save time.
- Preserve hand marks while producing professional, layered files.
- Standardize steps across teams to keep project documentation consistent.
Why digitize job site sketches and how this guide helps
Making your on-site drawings usable in other tools saves time and cuts errors. Portable, editable files let you export to PNG, SVG, or PDF for clear handoffs and printed deliverables.
We focus on practical steps that preserve the original feel while improving legibility. Techniques like binarization clarify line work and remove paper texture when needed. At the same time, selective retention of messy marks keeps intent visible for reviewers.
AI recognition—for example, tools that detect nodes, connections, and text—speeds diagramming and auto-arranges elements for fast iteration. Use AI where structure matters and keep manual control where nuance or artful marks convey meaning.
Digitizing early stabilizes scope and reduces misinterpretation. The result: faster approvals, fewer RFIs, and a clear source of truth as plans evolve.
- Flexible workflows for edits, markups, and versioning.
- Preserve character while improving clarity.
- Map outputs directly to submittals and client updates.
| Step | When to Use | Tool Value | Export |
|---|---|---|---|
| Brightness → Transparency | Paper background removal | Clean line art for overlays | PNG, layered PSD |
| Binarization | Clarify faint lines | Sharp edges for recognition | SVG, PDF |
| AI Diagram Recognition | Flows, wiring, layouts | Auto-arrange + editable nodes | SVG, PNG, PDF |
Prepare your paper drawings: capture clean source images via photo or scanner
Before any software step, secure a crisp, well-lit image of your paper work. This first step sets the tone for every edit that follows. A clean capture preserves thin lines and subtle marks so conversion methods work with minimal loss.
Set up even lighting and avoid glare when taking a photo
Use diffuse lighting—soft lamps or a lightbox—so highlights don’t blow out pencil strokes. Shoot at a perpendicular angle to prevent keystone distortion and keep proportions true.
Scan versus smartphone photo: choosing the right way on site
When you can, scan: scanners yield uniform backgrounds and crisper lines. If you must use a phone, lock focus and exposure and steady the device with a stand.
Recommended resolutions and file formats for import
Capture at 300–600 ppi equivalent so thin line work survives thresholding. Save images as PNG or high-quality JPEG for import into your editing tools.
“A reliable capture makes the rest of the workflow fast and predictable.”
- Keep paper flat and remove clips or shadows to avoid extraction artifacts.
- Include a scale or grid when shooting mixed light for easier perspective correction.
- Avoid heavy JPEG compression—artifacts become speckle noise later.
- Pack a simple kit: phone, soft light source, and a portable stand or clipboard.
| Capture Method | When to Use | Typical Output |
|---|---|---|
| Flatbed Scanner | Studio or office | Uniform background, crisp lines (PNG) |
| High-res Phone Photo | Field work, no scanner | Good detail if lit evenly (PNG / JPG) |
| Portable Document Scanner | On-site fast capture | Balanced results, quick import (PNG) |

Clean up and extract the line sketch in software
Start by isolating the lines so the drawing reads cleanly on screen. Import your capture into Clip Studio Paint and run Edit → Convert Brightness to Transparency. This drops the paper tone while keeping subtle strokes intact.
Convert brightness to transparency
After conversion, use Edit → Hue Compensation → Binarization to push contrast. Tweak thresholds until main strokes hold and fine gaps remain visible. Adjust slowly—overbinarizing fills thin intent lines.
Erase noise but keep character
Binarization often leaves black speckle from paper fibers. Zoom in and erase stray marks with a small eraser. Keep some messy edges—they give the drawing life.
Organize layers for flexible edits
Create a top layer for final line art, one beneath for color fills, and a separate group for notes. Patch gaps on a new layer so the original lines remain untouched. Use non-destructive levels or curves sparingly and save incremental versions as you go.
“Protect the original lines and work in layers so every change is reversible.”
- Convert brightness → transparency to remove background.
- Use binarization for crisp contrast, then clean noise manually.
- Keep line character, organize by layer, and save versions.
| Step | Clip Studio Tool | Benefit |
|---|---|---|
| Background removal | Convert Brightness to Transparency | Preserves tonal hierarchy for later editing |
| Contrast cleanup | Hue Compensation → Binarization | Sharp lines for vector export or coloring |
| Manual cleanup | Eraser / New patch layer | Removes noise while keeping natural edges |
This short, repeatable process makes the file ready for coloring, annotation, and final digitization without losing the hand-made feel.
Keep the traditional feel: brushes, layers, and coloring techniques
We preserve the paper-like quality by choosing tools and settings that echo real pencils and chalk. This keeps your files usable while retaining the original hand character.
Start with brush choice and layering. Select brush sets that emulate graphite, chalk, or charcoal so fills and shading keep a tactile touch.
Select brushes that mimic paper texture and pencil strokes
Pick a chalk brush for broad areas and a pencil tip for fine details. Test a few at screen resolution to confirm the grain reads in print.
Pressure, opacity, and texture settings for a natural hand feel
Calibrate pen pressure for line weight and enable mild texture mapping. Keep opacity moderate so layers blend without losing white flecks.
Overlay with darker colors to avoid muddying chalk and pencil textures
When glazing, use slightly darker tones so chalk speckle stays visible. Work color layers under the line art and use masks for edge softening.
| Brush Type | Best Use | Setting Tip |
|---|---|---|
| Chalk/Soft Grain | Large fills & texture | Low opacity, 20-40% texture |
| Pencil Tip | Details & hatching | Pressure sensitivity on, crisp edges |
| Soft Round | Shadows & glazing | Layer at low opacity; use masks |
handwritten sketch digitization with AI for diagrams and flowcharts
If your page maps structure—boxes, arrows, and labels—AI can turn that intent into a tidy, editable scheme. We use Sketch2Scheme to detect nodes, connections, and text so you keep meaning while skipping manual layout work.
When to use AI recognition
- Use AI when the drawing mainly encodes structure—flows, swimlanes, and labeled nodes—so recognition accelerates layout.
- Feed a clean capture into the system; clearer lines and arrows boost node and text accuracy and cut post-edit time.
Auto-align and edit
Sketch2Scheme auto-arranges elements, then opens the result in a visual editor or exports Mermaid code for version control. You can refine names, add site-specific logic, and reserve manual fixes for nuanced constraints like equipment IDs.
Export and compatibility
- Export to PNG for quick sharing, SVG for scalable precision, and PDF for client submittals.
- Files are diagrams.net–compatible and many teams import directly. Over 533 users have tested the recognition with positive feedback.
“Let the AI handle repetitive alignment; keep human edits for the decisions that matter.”
Optimize your process to save time from field to screen
We keep the hand-to-digital handoff fast and predictable. A simple, repeatable workflow reduces review loops and keeps teams aligned. Small choices—file names, a checklist, and clear versioning—add up to big savings in time.
Naming, versioning, and a repeatable step-by-step workflow
Standardize names with project code, date, discipline, and a version suffix so files are searchable and audits are fast.
- Create a reusable checklist that sequences each step: capture, clean, binarize, noise removal, layer setup, coloring, annotation, and export.
- Store master files with layers intact and publish flattened exports to prevent accidental overwrites.
- Use templates for annotation styles and color swatches to keep deliverables consistent and speed reviews.
- Document timing targets for each task to find bottlenecks and measure where automation or training saves time.
- Keep a shared glossary and symbol library so every discipline uses the same conventions across the project.
- Integrate AI selectively for diagram-heavy pages while retaining manual control for expressive or irregular line work.
- Close each cycle with a quick QC pass—check legibility at 100% zoom, confirm layer order, and verify export settings against client needs.

“Consistent rules make edits faster and reduce risk—so teams spend less time searching and more time deciding.”
| Control | What to do | Benefit | Tip |
|---|---|---|---|
| Naming & Versioning | ProjectCode_YYYYMMDD_Discipline_v01 | Fast retrieval, clear history | Lock masters and export flat files |
| Master Files | Keep layered PSD/CLIP/AI | Preserves editability | Archive exports for submittals |
| QC & Automation | 100% zoom check + selective AI | Reliable outputs, less rework | Track step timings for improvement |
Export professional deliverables in the right format
Choose exports that match how stakeholders will view and use your drawings. That decision saves time and prevents revision loops.
Screen versus print: choosing resolution and file format
For fast reviews on screen use 72–150 ppi and export a PNG. It loads quickly and shows detail for on‑call checks.
For print, choose 300 ppi or, better, a vector PDF/SVG. Vector formats keep lines sharp at any size, which matters for plan sets and boards.
Always provide a flattened view for quick checking and a layered source so edits are easy. Label the topmost layer and key groups clearly.
When diagrams are involved, export to SVG or PDF and include diagrams.net-compatible files so stakeholders can edit logic without special tools.
- Match resolution to destination: 72–150 ppi for screen, 300 ppi or vector for print.
- Prefer SVG/PDF for scalability; use PNG for quick reviews.
- Deliver a flattened export plus an editable layer source and a short readme with color profile, export settings, and version.
“Embed fonts or convert text to outlines in final PDFs to avoid layout drift.”
Conclusion
, Finish strong: a repeatable process turns rough field notes into reliable, client-ready drawings.
We show how a single paper photo, a clean convert and careful binarization preserve the original hand mark while making files editable. Combine selective AI recognition with manual cleanup to keep intent intact.
Keep a clear master layer stack, name files consistently, and export both flat and vector formats so each project moves smoothly from review to print.
Follow these steps and you turn ad‑hoc sketches into dependable deliverables that honor the hand feel and save time across teams.
FAQ
What is the fastest way to turn job site sketches into professional digital documents?
Start by capturing a clean image—use a flat, glare-free photo or a scanner. Import the file into your graphics or vector software, convert the background to transparent, clean up stray marks, and organize separate layers for lines, color, and annotations. Work with brushes that mimic pencil or ink to preserve the original feel, then export in the appropriate format (PNG, SVG, or PDF).
Why should we convert paper drawings and on-site notes to digital format?
Digital files make collaboration, versioning, and archive retrieval faster and more reliable. They improve readability, reduce rework from misunderstood marks, and let you reuse line work in CAD or presentation assets. Digital formats also simplify sharing with stakeholders who need clear, consistent documents.
How do we set up even lighting and avoid glare when taking photos on site?
Use diffused light—cloudy daylight or a soft LED panel—to minimize shadows. Hold the camera parallel to the page, secure the paper so it lies flat, and avoid direct sunlight. If possible, use a tripod or a phone clamp to keep the image steady and sharp.
When should we scan versus use a smartphone photo for capture?
Choose a scanner when resolution and color consistency matter, or when you have many sheets to batch process. Use a smartphone when speed and mobility are priorities—on tight schedules or remote sites. For phones, follow the lighting and alignment tips and capture at the highest available resolution.
What resolutions and file formats do you recommend for import?
For raster capture, aim for 300–600 DPI for print-quality output; 150–300 DPI is often fine for screen use. Save masters as TIFF or high-quality JPEG for raster workflows. For final deliverables, export PNG for raster line art, SVG for scalable diagrams, and PDF for distribution or print.
How do we remove paper background and keep line clarity?
Use a brightness/contrast adjustment or threshold (binarization) to separate ink from paper. Convert near-white areas to transparency or apply a color dodge blending to remove the paper tone. Work non-destructively on a duplicate layer so you can refine settings without losing the original capture.
What is the best way to erase black noise and stray marks without losing the hand-drawn touch?
Use targeted erasers and masking tools at low hardness, or apply spot-healing brushes that respect stroke edges. Keep an undisturbed copy of the raw capture on a separate layer. Preserve texture by avoiding aggressive smoothing and by using textured brushes when retouching.
How should we organize layers for line art, color, and annotations?
Create clear, named layers—Lines, Base Color, Shading, Annotations, and Reference. Lock completed layers to avoid accidental edits. Use blend modes (Multiply for lines, Overlay for textures) and group related layers into folders to speed edits and exports.
Which brushes and settings help preserve a natural hand feel?
Choose brushes that simulate pencil grain, charcoal, or ink with subtle texture. Set pressure sensitivity for stroke width and opacity, and add slight texture in the brush tip to mimic paper tooth. Keep opacity and flow moderate to maintain layered value build-up.
How do we avoid muddying chalk and pencil textures when adding color?
Use separate layers for color beneath line art and apply darker overlay layers selectively for contrast. Limit saturation in sensitive areas and use multiply or soft light blend modes to protect underlying texture. Test on small patches before applying broadly.
When should we use AI recognition for diagrams and flowcharts?
Use AI when you need quick conversion of nodes, connectors, and handwritten labels into editable shapes and text—especially for repetitive diagrams or when you must export to vector formats. Verify AI results; correct misrecognized text or misaligned nodes in the visual editor.
What export options should we use for diagrams and deliverables?
Export editable vectors as SVG for web and diagram tools, and PDFs for client distribution or print. Provide layered PSD or native files when clients need editability. For raster previews or online delivery, use PNGs at 72–150 DPI depending on screen and file-size needs.
How can we optimize the process to save time from field to screen?
Standardize capture settings, file naming, and a versioning scheme. Use templates with preconfigured layers and brush presets. Automate repetitive tasks—batch crop, auto-contrast, and conversion scripts—so each project follows the same repeatable workflow.
Which formats work best for collaboration and diagram editing in tools like diagrams.net?
SVG and PDF export well for diagrams.net and similar editors. Provide layered exports (SVG with grouped elements) so nodes and connectors remain editable. When necessary, supply a PNG for quick previews and a high-res PDF for printing.
How do we maintain privacy and security when photographing or uploading field drawings?
Use encrypted transfer tools and private cloud storage with access controls. Remove sensitive annotations before upload when possible. Maintain local backups and audit access logs to ensure compliance with company security policies.
Leave a Reply