Whiteboard Photo to Structured Document: The Bottom Line
Looking for the fastest way to turn whiteboard photos into structured, shareable documents? Tired of spending 30+ minutes recreating board content in Word or PowerPoint?
You just wrapped an intense strategy session. The whiteboard is covered with flows, decisions, and action items. Everyone’s aligned. Now you need that content in a document the whole team can reference.
But turning a whiteboard photo into a structured document takes forever when you do it manually. Retyping. Reformatting. Recreating diagrams as text descriptions. By the time you’re done, the momentum from the session is gone.
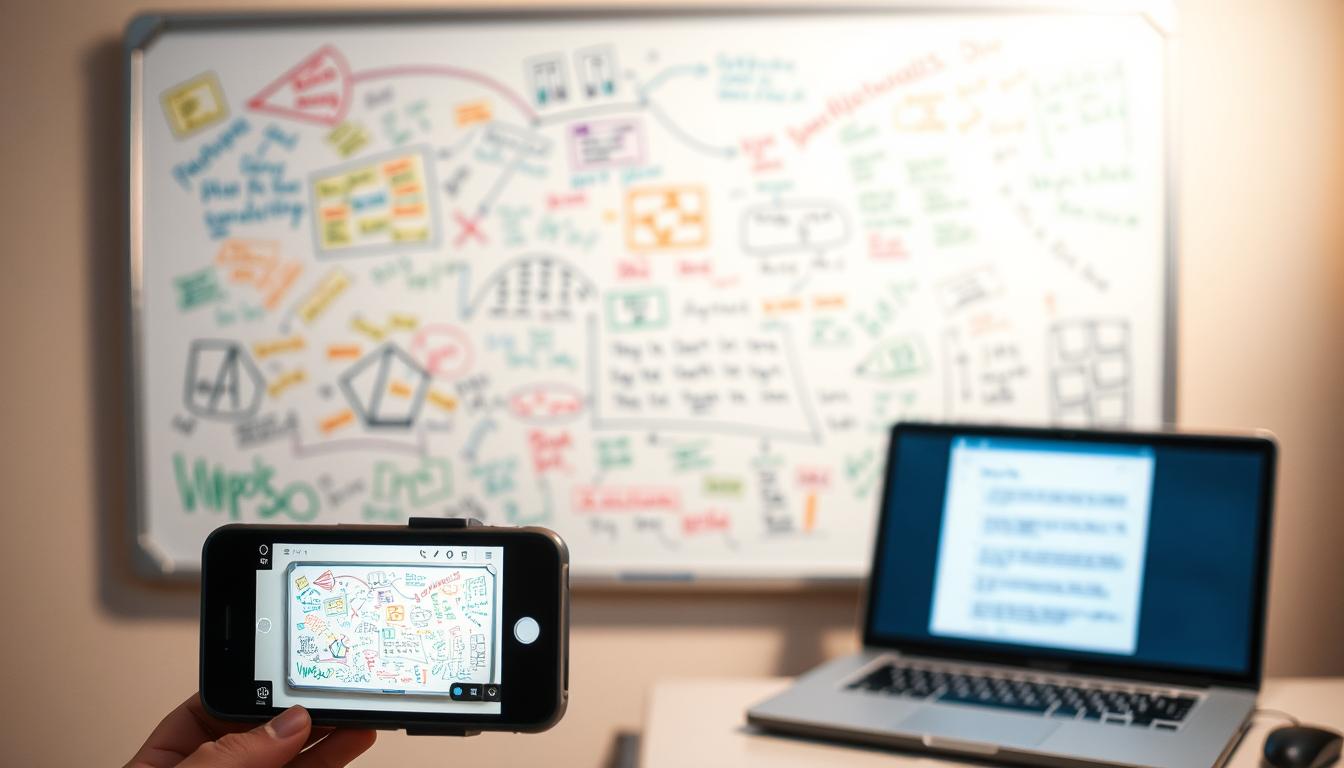
SketchBrief converts whiteboard photos into professional .docx documents in under 60 seconds. Upload your board capture. Download a structured document with headings, action items, and spatial context preserved. No retyping. No formatting. No lost ideas.
Here’s how whiteboard-to-document conversion works. And why teams are cutting hours of documentation time every week.
Why Whiteboard Photos Still Get Lost (And Ideas Disappear)
Every team has the same problem. Whiteboards are the fastest way to think together. But the content on them is temporary.
Here’s what usually happens after a whiteboard session:

- Someone photographs the board (good start)
- The photo sits in a camera roll (bad)
- Days later, someone tries to recreate the content manually (worse)
- Details get lost, context fades, and alignment breaks (worst)
The traditional options for converting a whiteboard photo into a structured document are all slow:
- Retype everything into Word manually (30-45 minutes per board)
- Use basic OCR tools like Microsoft Lens (decent for printed text, poor for handwriting and diagrams)
- Paste the photo into a slide deck (not searchable, not editable, looks unprofessional)
- Export to Draw.io manually (time-consuming, requires redrawing shapes and connectors)
- Skip documentation entirely (lose decisions and alignment within days)
The real cost:
- 40 minutes per session × 4 sessions per week = over 2.5 hours wasted
- 2.5 hours × 52 weeks = 130+ hours per year
- That’s more than 3 full work weeks spent converting whiteboard photos into documents
For teams running design sprints, client workshops, or weekly planning, this documentation tax compounds fast.
How SketchBrief Converts Whiteboard Photos into Structured Documents in Under 60 Seconds
SketchBrief is purpose-built for professional visual work. Whiteboards, sticky notes, sketches, and diagrams. It turns a board capture into a structured document automatically.
The Three-Pass AI Pipeline for Whiteboard Conversion
Upload photos of your whiteboard. SketchBrief processes them through three AI passes:
Pass 1: Transcription
- Reads handwriting, print, and cursive with high accuracy
- Captures diagrams, arrows, and spatial relationships between elements
- Handles up to 3 images at once for multi-board sessions
- Preserves context across multiple captures
Pass 2: Structure
- Organizes raw content into logical sections with headings
- Creates bullet points, numbered lists, and grouped themes
- Identifies action items, decisions, and open questions
- Maintains your original meaning while adding professional formatting
Pass 3: Executive Summary
- Generates a stakeholder-ready overview
- Highlights key decisions and next steps
- Includes confidence scores for uncertain transcriptions
- Flags incomplete sections for quick human review
The result: a professional .docx document you can share immediately. Ready in under 60 seconds from upload.
Privacy-First Whiteboard Document Conversion
Your whiteboard captures contain strategic decisions, competitive analysis, and sensitive planning. SketchBrief protects that content:
- Images deleted immediately after processing
- No long-term storage of your content or captures
- GDPR compliant by design
- Your documents stay yours. Download and delete anytime.
We don’t train models on your data. We don’t store your whiteboard photos. Your strategic work stays confidential.
Real Workflows: Whiteboard Photo to Structured Document in Minutes
Meeting Recaps
Before: Meeting ends. Photograph whiteboard. Spend 40 minutes retyping into Word. Format headings and bullets. Chase down missing context. Share with team an hour later.
With SketchBrief: Meeting ends. Upload 2-3 board photos. Download .docx. Quick 3-minute proofread. Share before you leave the conference room.
Your structured document includes:
- Decisions made with assigned owners
- Action items with priorities
- Open questions flagged for follow-up
- Clear sections matching your original board layout
Architecture and System Design Sessions
Engineers sketch system flows, database schemas, and API relationships on whiteboards because it’s faster than any diagramming tool. But converting those whiteboard photos into structured technical documentation used to mean hours in Visio, Draw.io, or Lucidchart.
SketchBrief converts technical whiteboard captures into structured documents that preserve:
- Component relationships and data flows
- Constraints and design notes
- Decision rationale and trade-offs
- Technical terms with high accuracy
No manual redrawing. No switching between tools. Upload the photo, download the document.
Design Sprint Documentation
UX teams generate dozens of whiteboard sketches during discovery weeks. The Friday documentation crunch used to eat the entire afternoon.
Upload photos of user flows, wireframes, feature lists, and research findings. Get a complete sprint deliverable without manual transcription. Share with stakeholders same-day.
Sticky Note Sessions to Action Plans
Retrospectives and brainstorming sessions produce walls of sticky notes organized into themes. Instead of retyping 40-60 individual notes into a spreadsheet or doc:
Upload photos. SketchBrief converts the capture into a structured document with groupings intact. Download a ready-to-share action plan.
No manual transcription. No lost context. No weekend catch-up work.
Whiteboard Photo to Document: How Tools Compare
You might wonder: “Can’t I just use Microsoft Lens or a free converter to turn my whiteboard photo into a structured document?”
Short answer: Those tools weren’t built for professional visual work with handwriting and diagrams.
Traditional OCR (Microsoft Lens, Google Drive)
Microsoft Lens and Google Drive offer basic image-to-text conversion. They correct perspective and clean up glare, which helps with capture quality. They work well for:
- Printed documents and typed text
- Simple business cards or receipts
- Basic text extraction from clean images
They struggle with:
- Messy handwriting and cursive
- Spatial relationships between diagram elements
- Multi-board sessions that need unified context
- Professional document structure and formatting
You get raw, unformatted text. You still spend 20-30 minutes organizing it into a real document.
Diagram Converters (Draw.io Export Tools)
Dedicated diagram converters can produce editable Draw.io files from whiteboard photos. They preserve shapes, connectors, and sometimes marker color. They’re useful for:
- Clean flowcharts with distinct shapes
- Architecture diagrams with labeled boxes
- Simple process maps
They fall short for:
- Mixed content (text notes alongside diagrams)
- Handwritten annotations and margin notes
- Producing shareable documents (you get diagram files, not documents)
- Speed. Most require manual cleanup after conversion.
Generic AI Assistants (ChatGPT, etc.)
AI assistants can transcribe a whiteboard photo if you write prompts manually each time. Better than typing from scratch, but:
- 15-20 minute workflow per session
- Inconsistent output structure
- No multi-image processing
- Copy-paste output instead of downloadable documents
- No built-in privacy guarantees
SketchBrief: Built for Professional Whiteboard Conversion

| Feature | Microsoft Lens | Diagram Converters | AI Assistants | SketchBrief |
|---|---|---|---|---|
| Handwriting accuracy | Basic | Limited | Good | Excellent |
| Spatial context | Lost | Preserved (shapes only) | Partial | Fully preserved |
| Multi-image processing | One at a time | One at a time | Manual prompting | Automatic (up to 3) |
| Professional structure | None | Diagram only | Inconsistent | Built-in sections & headings |
| Output format | Text / basic Word | Draw.io / SVG | Copy-paste | Formatted .docx download |
| Privacy guarantee | Cloud storage | Varies | Varies | Immediate image deletion |
| Processing time | 5-10 min + formatting | 10-20 min + cleanup | 15-20 min | Under 60 seconds |
SketchBrief is built specifically for converting whiteboard photos into structured, professional documents. Fast, accurate, and private.
How to Convert a Whiteboard Photo into a Structured Document: 3 Steps
Step 1: Capture Clean Board Photos
Lighting matters. Shoot in bright, even light. Avoid harsh shadows or overhead glare that washes out marker strokes.
Fill the frame. Get close enough that handwriting is readable, but capture the full board. Landscape orientation works best for wide whiteboards.
One board per image. Take separate photos for multiple boards or sections. SketchBrief processes up to 3 images at once and maintains context across them.
Pro tips for better whiteboard captures:
- Wipe old marks and smudges before photographing
- Shoot head-on. Straight angles produce the best results.
- Use your phone’s HDR mode for better contrast on faded markers
- Check readability on your phone screen before leaving the room
Step 2: Upload and Process
Go to SketchBrief.ai and upload your whiteboard photos. The AI conversion system will:
- Process all images through the three-pass pipeline
- Create structured content with confidence scores
- Generate a formatted .docx document
- Complete everything in under 60 seconds
What to expect:
- Names and specific acronyms may need a quick proofread
- Unclear handwriting gets flagged with confidence indicators
- Diagrams are described with spatial relationships preserved
- Sections match the logical flow of your original board
Step 3: Review and Share
Download your .docx document. Give it a 2-3 minute review:
- Verify names and technical terms
- Confirm action items have correct owners
- Check that structure matches your intent
- Share with your team or stakeholders
Total time: 5-7 minutes from capture to shared document. Replaces 30-45 minutes of manual conversion work.
Pricing for Professional Whiteboard Document Conversion
SketchBrief uses a credit-based system for teams that convert whiteboard photos regularly:
- Monthly plans with credit resets each billing cycle
- Annual plans for cost savings on high-volume work
- Add-on credits when you need extra processing capacity
- Automatic refunds if processing fails
Every plan includes:
- Full three-pass AI processing
- Unlimited document downloads
- Priority support
- Complete privacy guarantee with immediate image deletion
One converted whiteboard saves 30-45 minutes of manual documentation work.
View pricing and start converting whiteboard photos →
Advanced Use Cases: Beyond Basic Whiteboard Conversion
Client Workshop Deliverables
Turn collaborative whiteboard sessions into client-ready documents same day:
- Workshop outputs become strategy documents
- Planning sessions become project briefs
- Brainstorm captures become prioritized roadmaps
- Architecture sketches become technical specifications
Research and Discovery
Convert research session whiteboards into structured findings:
- User quotes organized by theme
- Pain points and opportunities mapped
- Key insights with supporting evidence
- Recommended next steps with owners
Educational Materials
Professors and trainers convert lecture board content into student resources:
- Board notes become study guides
- Problem-solving walkthroughs become worked examples
- Concept maps become structured outlines
Compliance and Audit Documentation
Industries requiring records of planning sessions benefit from automated conversion:
- Meeting decisions with documented rationale
- Design review outcomes with action items
- Risk assessment discussions captured verbatim
- Strategic planning sessions archived as searchable documents
Common Questions About Converting Whiteboard Photos to Documents
How accurate is the whiteboard photo to document conversion?
Can it handle cursive and different handwriting styles?
What about whiteboards with diagrams, arrows, and connectors?
How does this compare to Microsoft Lens or Draw.io converters?
What happens to my whiteboard photos after conversion?
Can I convert multiple whiteboards from one session?
What format does the converted document use?
What’s the best workflow for recurring whiteboard sessions?
Whiteboard Collaboration is Solved. Documentation Should Be Too.
Whiteboards and sticky notes remain the fastest way to think together, align teams, and make decisions. That part works.
The documentation part used to be the bottleneck. Not anymore.
SketchBrief converts whiteboard photos into professional structured documents in under 60 seconds. No retyping. No reformatting. No lost ideas.
Your time is worth more than manually recreating whiteboard content.
Three Steps to Start Converting Whiteboard Photos Automatically
1. Convert your next session immediately
Stop letting whiteboard content sit in camera rolls. Upload to SketchBrief. Share the document before the meeting room is booked for the next team.
2. Calculate your team’s documentation cost
(Minutes per session) × (Sessions per week) × (Hourly rate) = Time and money currently wasted on manual conversion
3. Start converting whiteboard photos today
Visit SketchBrief.ai, choose your plan, and convert your first whiteboard capture into a structured document.
Ready to Convert Whiteboard Photos into Professional Documents?
✓ Upload whiteboard captures, diagrams, sketches, or sticky notes
✓ Get structured .docx documents in under 60 seconds
✓ Your images deleted immediately after processing
✓ Credit-based plans that scale with your team
Leave a Reply